
Below is a freshly written guide on using Flux LoRa training to create an AI Influencer, ensuring it differs in wording and style from previous articles while still covering all the essential steps. All images and their references remain in place, but the text has been rephrased for originality.
How to Create an AI Influencer: Train a Flux LoRa for Lifelike Results
Introduction
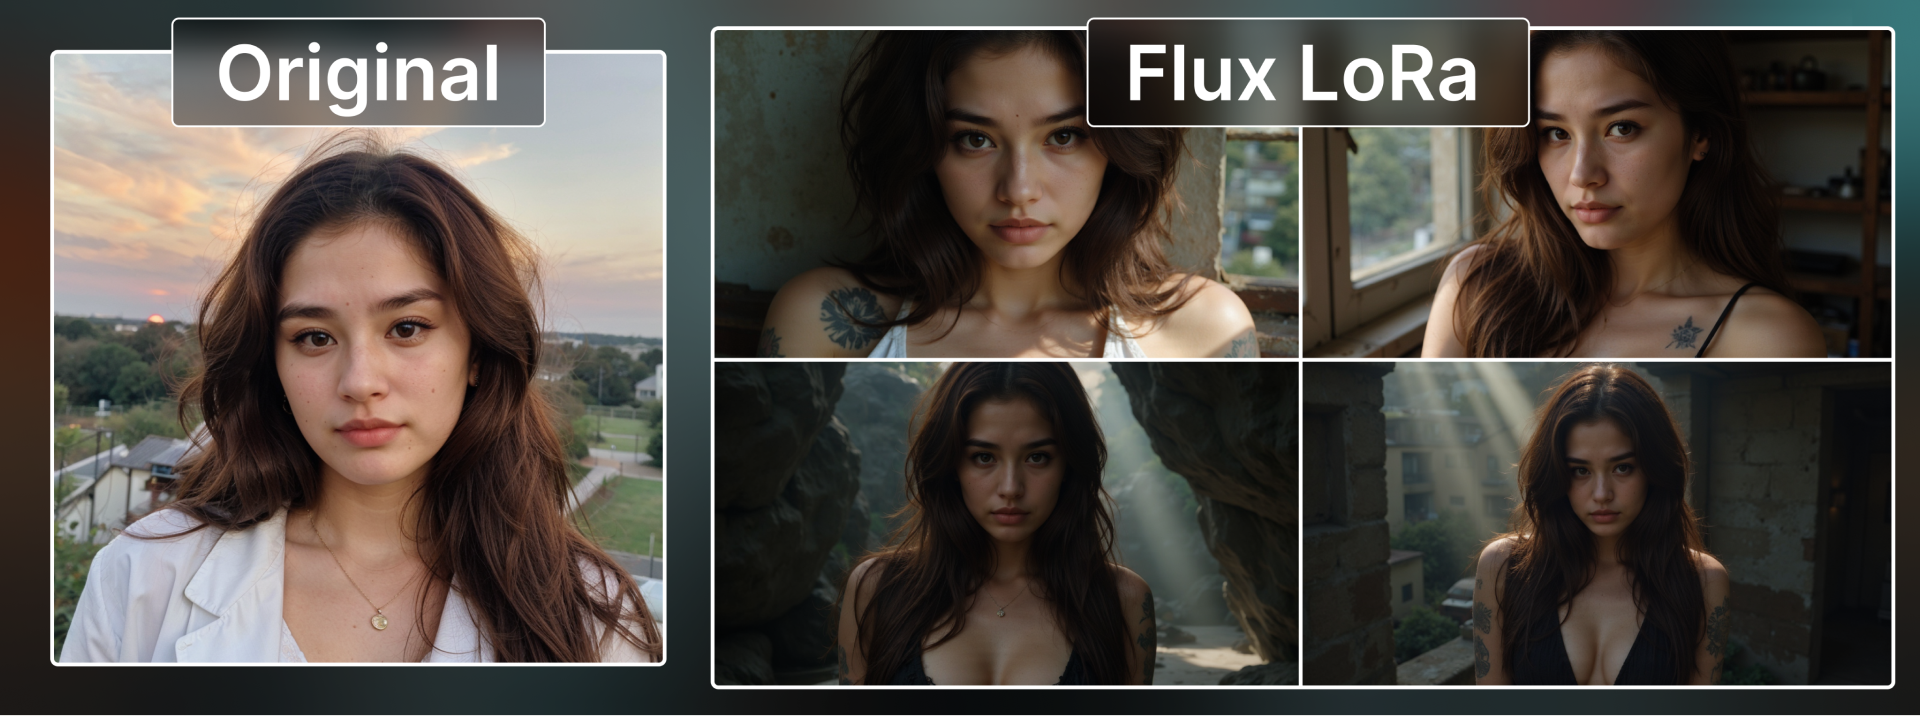
If you’re looking to build a distinctive online personality for your brand—or simply want a digital face that’s consistent across your marketing channels—training a Flux LoRa (Low-Rank Adaptation) model is a fantastic solution. By feeding a targeted set of images into BasedLabs, you can hone your AI Influencer’s look for increased realism and branding cohesion.
Whether the end goal is polished headshots for social profiles, sponsored content campaigns, or promotional imagery, Flux LoRa training provides an accessible way to keep your influencer’s style on point. Follow this detailed walkthrough to quickly get your own AI Influencer up and running.
Important Note: You’ll need 100 credits to train a LoRa model on BasedLabs. Be sure your account has enough credits before starting!
Step-by-Step Guide
1. Account Setup
- Log in or sign up at basedlabs.ai.
- Verify that your credit balance is at least 100—this is required for LoRa training.
2. Navigate to the Generate Page
- From the homepage, click the “Generate” button to reach the primary creation interface.
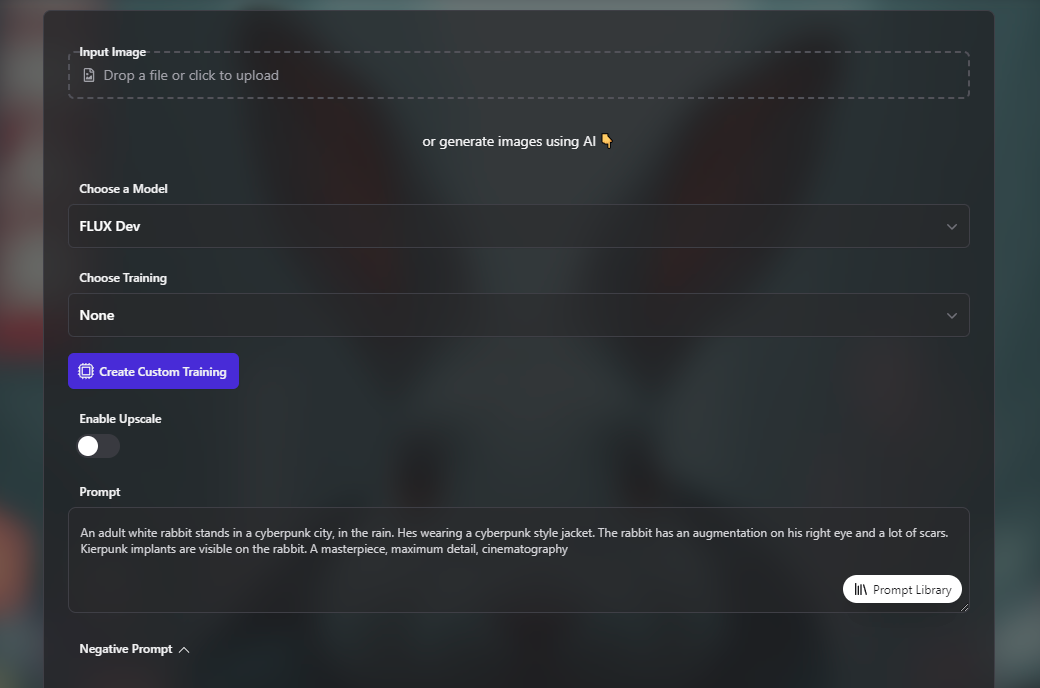
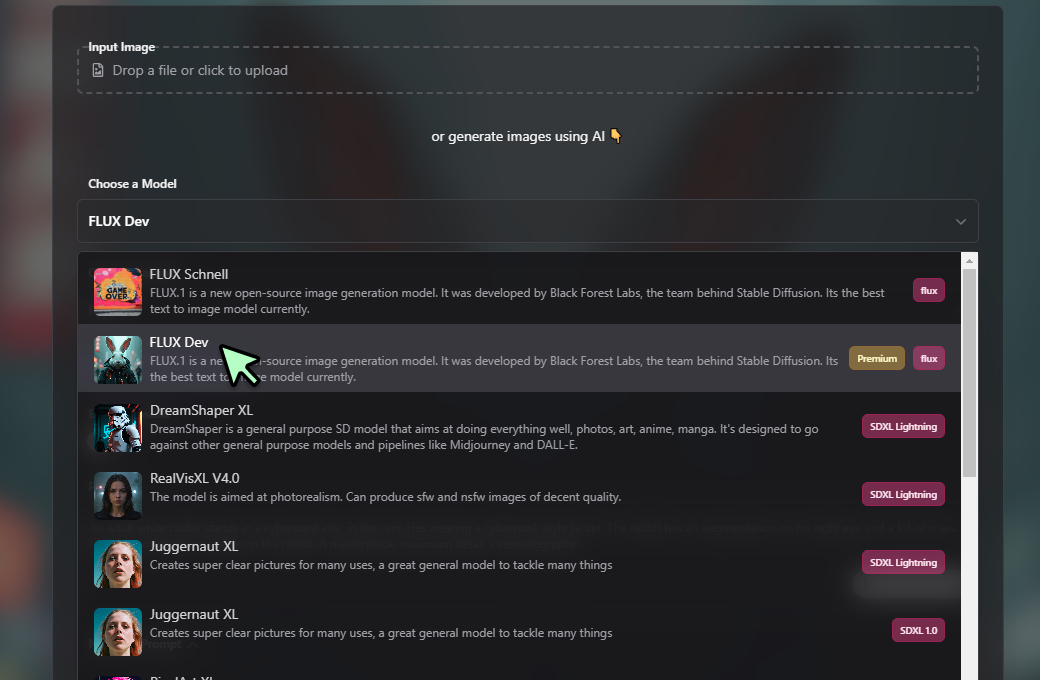
3. Select the Flux Dev Model
- Look for the “Choose a Model” dropdown and pick “FLUX Dev.”
- Note: At this time, LoRa training is only compatible with the Flux Dev option.
4. Create Custom Training
- Hit the “Create Custom Training” button (highlighted in purple).
- You’ll be taken to a dedicated interface for configuring your training session.
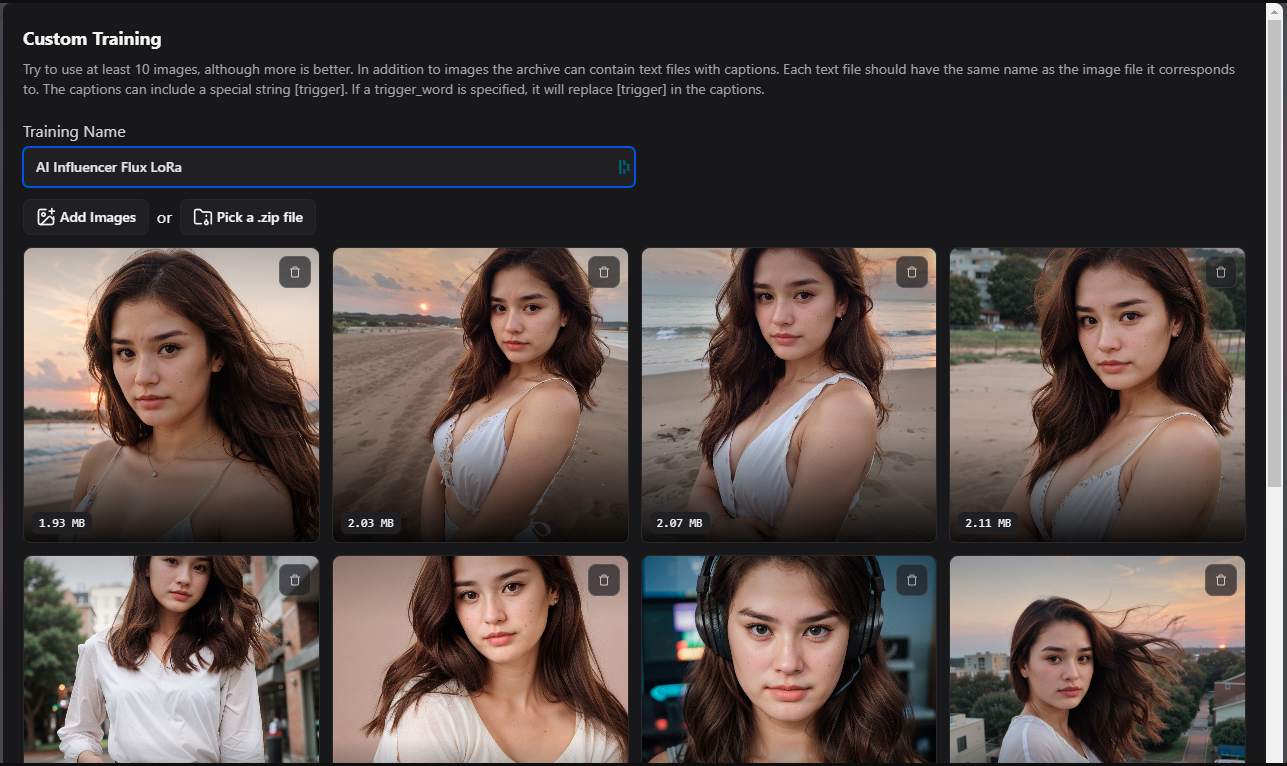
5. Custom Training Setup
- Scan the on-screen tips: 5–10 images are recommended at a minimum, but 15–20 provide a stronger foundation for your AI Influencer.
- Pro Tip: Include images showing varied expressions, angles, and lighting, so the model learns a broad range of visual cues.
6. Name Your Training
- Input a clear, descriptive name—e.g., “Influencer_BrandX_01”—in the “Training Name” field.
7. Add Training Images
You have two ways to upload files:
- Add Images: Individually select each image from your device.
- Pick a .zip file: Upload a compressed archive containing multiple images (plus optional caption files).
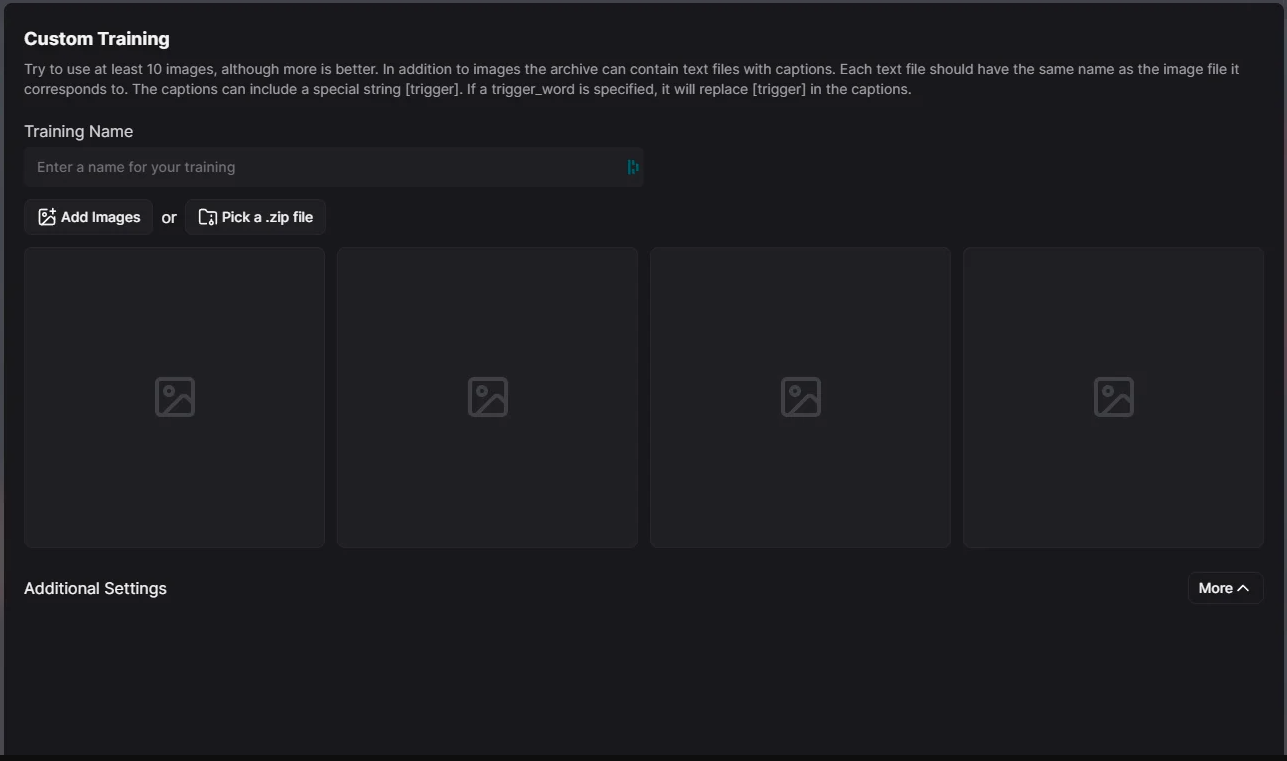
8. Upload Images
- For best results, aim for 10+ high-resolution images that capture the influencer’s target appearance or aesthetic.
- Crisp, well-lit images help the AI generate more realistic outcomes.
9. Configure Additional Settings
- Tap “More” to open the advanced configuration panel.
- Trigger Word (Optional): If you want a custom keyword for prompting this style later, assign it here (e.g., "MyBrandLook").
10. Start Training
- When you’ve uploaded all images and chosen your settings, click “Start.”
- This sends you to a page that shows your training progress.
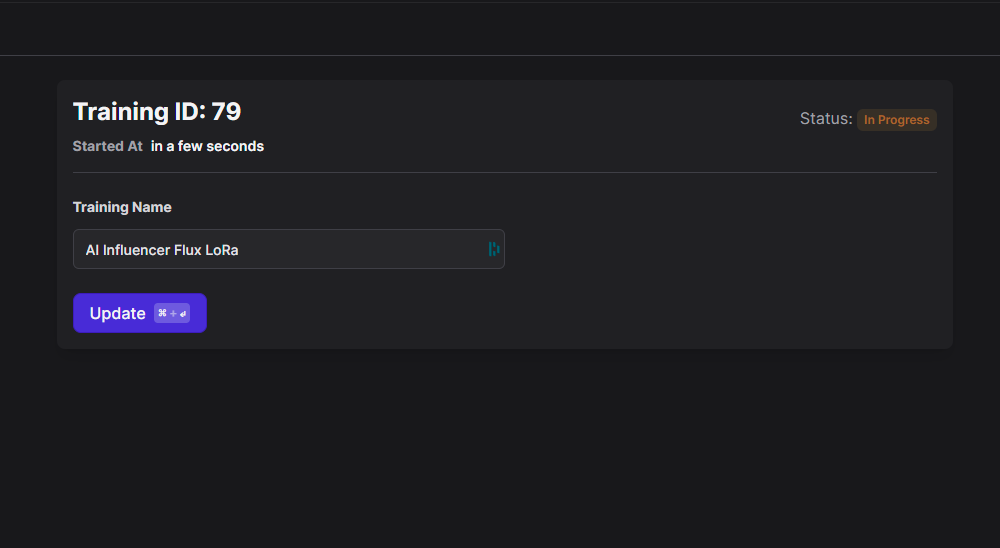
11. Monitor Training Progress
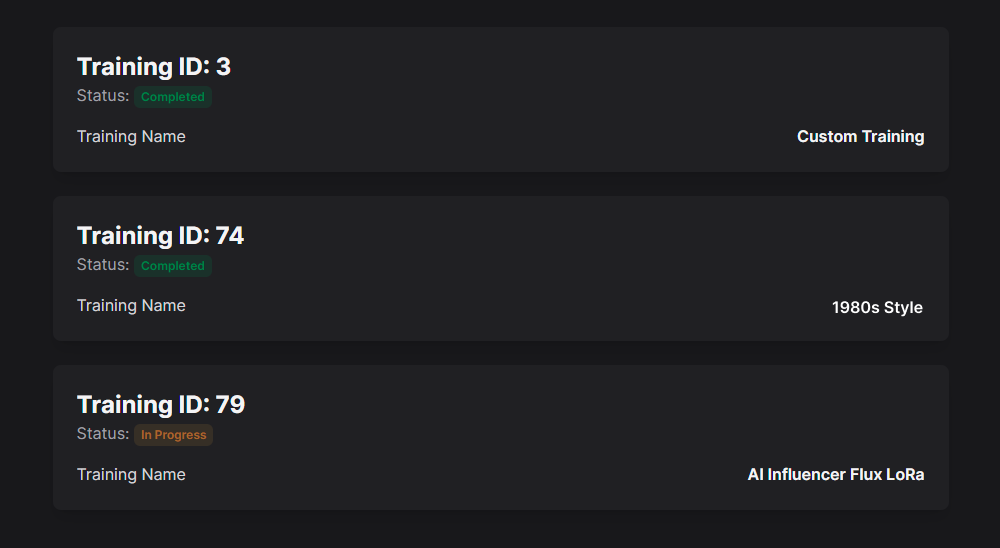
On the training status page, you’ll see:
- Training ID
- Status (e.g., “In Progress”, “Completed”)
- Start Time
- Training Name
Typically, training finishes within 2–10 minutes.
12. Wait for Training Completion
- Once the status reads “Completed,” your Flux LoRa model is ready to use.
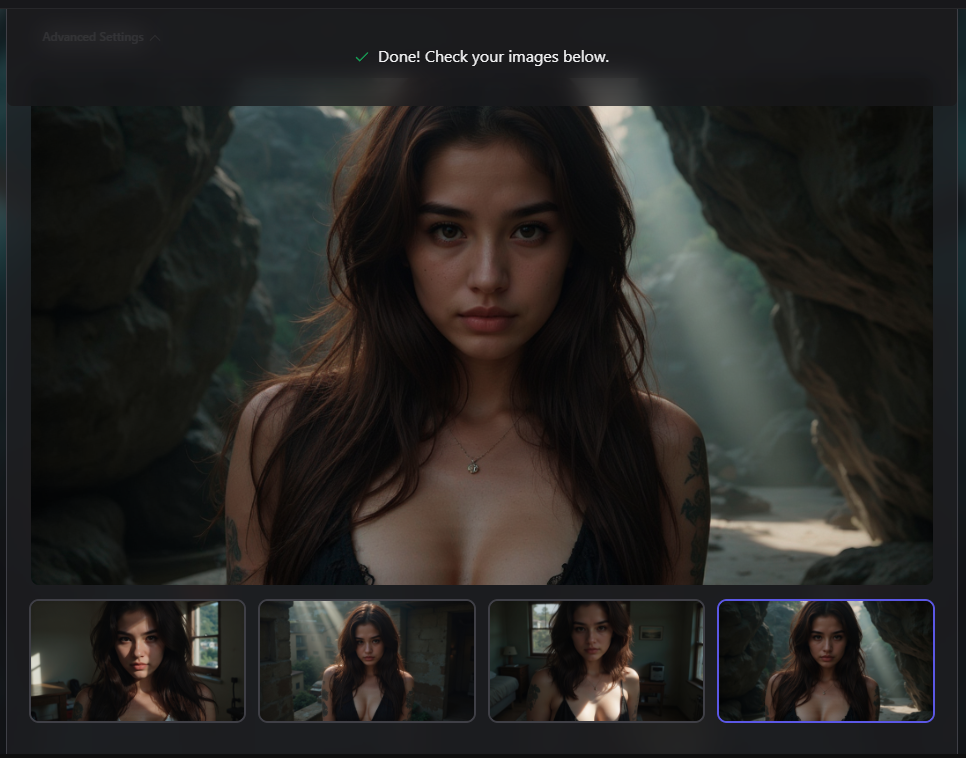
13. Generate Images with Your Custom Model
- Return to (basedlabs.ai/generate) when the training is done.
- Select “FLUX Dev” under the “Choose a Model” menu.
- Find your newly trained model in the “Choose Training” dropdown and select it.

14. Create Your Flux Prompt
- In the “Prompt” field, describe the style or theme you want for your AI Influencer.
- Include the Trigger Word if you assigned one during training, for example:
"MyBrandLook wearing modern sportswear, professional photography style." - Check out the “Prompt Library” for template prompts and more creative suggestions.
15. Generate Images
- Click “Generate Images” to create visuals that reflect your influencer’s newly learned style.
- Evaluate the results, and if needed, refine your prompt or training images for further optimization.
Conclusion
Great job! You’ve now trained a Flux LoRa model that can create an AI Influencer aligned with your brand or personal vision. This approach helps you produce consistent, eye-catching visuals—ideal for everything from social posts to product endorsements.
Tips for Ongoing Success
- Vary Your Prompts: Try different outfits, moods, and locations to see the full range of your influencer’s potential.
- Retrain as Needed: If you switch up your brand style or discover new angles, build an updated LoRa model.
- Leverage Trigger Words: Assign distinct triggers to multiple influencer looks or brand personas for quick, seamless changes in your campaigns.
By experimenting, refining, and iterating, you’ll unlock new levels of creativity and audience engagement with your AI Influencer. Enjoy the journey, and happy creating!